I always try to find this online but it is difficult. Here's what I have from my own experience. My baking experience comes from the airfryer.
1) Sugar:
Steamed cupcakes uses much less sugar than baked muffins. You are talking roughly 3-4 tablespoons versus half a cup. If you are looking for some sweet stuff yet want to cut down on sugar, go for steamed cupcakes. I know it's conflicting... you know, sweet but not so sweet... I go through this all the time...
2) Oil/butter:
Steamed cupcakes uses less oil than baked muffins. The comparison is roughly 2 tablespoons vs 1/3 cup. I tend to avoid using butter in my muffins anyhow because it is not so healthy, which sacrifices some aroma and taste but I can live with it. On the other hand, you can also replace some of the oil or butter in your muffin recipes with applesauce if you can live with the texture. Yeah, go as far as you can when it comes to reducing fat. I fully support!
3) Batter:
When making muffins it is ok to leave some flour patches after mixing. They resolve themselves during baking. But not for steamed cupcakes! I made this mistake and ended up with 'floury' steamed cupcakes. Therefore you need to be especially efficient when mixing steamed cupcakes batter.
The batter of steamed cupcakes also tend to be more watery than that of muffins. No biggy, just an observation.
4) Texture:
This is obvious, at least to me when I make one or the other every week. Steamed cupcakes tend to be more 'rubbery', just imagine the Chinese 'huat kueh' "(Gula Melaka steamed cake). Muffins, well you know what muffins texture is like. I would use "fluffy" to describe a muffin, but probably only "soft" for steamed cupcakes.
5) Moisture:
Steamed cupcakes are moist as long as you don't over-steam. Oh yes... a paradox huh... No dear, it doesn't mean the longer you steam the more moisture you get. By the same token, overbaking causes drying of muffins.
Ok, this is not a difference... yeah I'm running out of points.
6) Cooling time:
Aha! There is one more.
Steamed cupcakes cool down MUCH faster than baked muffins. I find that by the time I am done with steaming my muffins, those from my first batch are almost completely cooled down. While if I baked them, they will still be more than warm. Probably no issue, but it links me to my next point.
7) Heatiness:
Well this is not substantiated. But being a Chinese since young I am exposed to the culture of 'heaty' food. One of the reasons when I choose to steam than bake, is that I feel eating too much baked goods is heaty, leading to sore throat, cough, pimples etc. The fast cooling time of steamed cupcakes, whether true or not, makes me feel that they are less heaty than baked muffins.
8) Effort:
Almost the last point. Baking with the airfryer takes less effort than steaming. Just pop them in, when done just close it. With steaming you need to prepare your wok, the stand, watch that you have enough water, get some droplets here and there and then finally you need to clear them after you are done.
9) Crunchy top:
Need I explain? Steamed cupcakes... what crunchy top?
10) Taste:
Finally, the most important element especially when you are done with your need-to-bake/steam therapy yet does not want to eat all the muffins/cupcakes so you decide to share the calories with others.
At the end of the day, while steamed cupcakes have many benefits, I find that baked muffins taste better. If you want to make your steamed cupcakes taste better, I suggest putting in some sort of filling. Like when you steam chocolate cupcakes, add chocolate ganache in the middle as a nice surprise.
When I started writing I never thought I'll end up with 10 differences. So there you go, I hope it's useful!
Wednesday, 2 July 2014
Tuesday, 1 July 2014
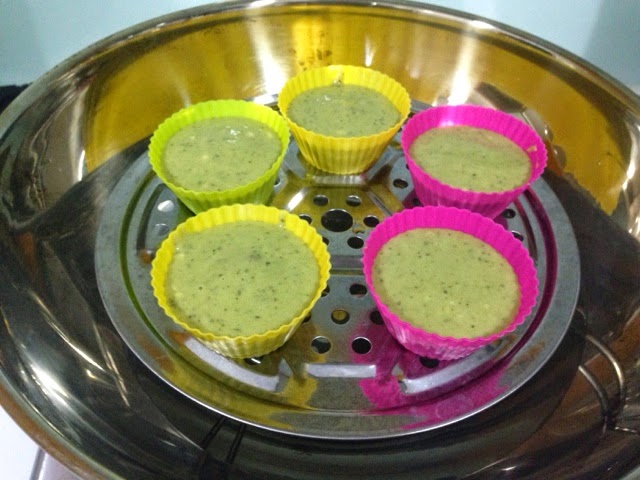
Steamed green tea cupcake with red bean filling
After baking muffins in the Airfryer for many times I have exhausted my utility and satisfaction. So I decided to go back to steaming cupcakes which I tried before and failed. This time, my third attempt, I managed to succeed.


Here goes the green tea cupcake recipe!


Taken almost entirely from Nami of justonecookbook, who is so talented and so helpful!
Makes ~7-8 silicon cupcakes
Ingredients:
- 2 large eggs
- 2 Tbsp. canola oil
- 2 Tbsp. honey
- 6 Tbsp plain regular yogurt
- 3 Tbsp. sugar (3 is a little on the bland side. If you prefer sweeter you can use 4)
- 1 cup all-purpose flour
- 2 tsp. baking powder
- 2 tsp. matcha powder
- Sweet red bean paste
How:
1) Preheat a wok of water at medium high heat.
2) In a large bowl, whisk eggs and oil together.
3) Add yoghurt and honey and mix well.
4) Add sugar and mix thoroughly.
5) Sift flour and baking powder together.
6) Add egg mixture to flour mixture. Mix well with spatula gently and efficiently without introducing air. Aim for less than 15 strokes. The lesser the better. If you need more strokes, do it but at the end drop the bowl a few times on the tabletop to get rid of air bubbles.
6) Add matcha powder and mix well again gently without introducing air. Make sure there are no flour patches left else you will still see the flour in your cupcake after they are done.

7) Fill 1/3 of silicon cup, add your filling (about 1 teaspoonful) and top up with batter till 3/4 full.
Note: aim for equal height of batter below and on top of filling so that the filling stays in the middle after it's done.
 |
8) Put into wok, cover loosely with aluminium foil to prevent condensation from lid to fall on cupcakes and put on the lid.

9) Steam for 8 min, switch off fire and check with toothpick. If it comes out clean it's done.
 |
| If you use fresh matcha powder the green colour will be nicer because it will be evenly green and not in patches like this. You will see this when you fold in the powder. |
10) Remove from wok and silicon cup to cool on rack.
Finally I understand the importance of mastering the Chinese language
Since young English has always been my preferred language. I was not a 'banana' though, I was able to speak Chinese reasonably well. When I was in Primary School or Secondary School I even attempted to read Chinese books. But the language is simply difficult and I gave up. On the other hand I continued to enjoy the English language as well as reading. Through reading, subconsciously, my English gets better and the divide becomes bigger.
So why did it take me thirty years to appreciate the Chinese language? The first hard hit came a year ago. There were Chinese visitors who were coming to our company and I had to do an introduction in Chinese. Now, if it were in English I could do it impromptu. But Chinese... I had to write a script first.
I started writing, and I got stuck within the first 5 words. So I asked my colleague who is from China. She suggested an introduction, I started to write again but I got stuck every 2nd word. She had to write the whole page for me. And then it hit me. I was embarassed, ashamed. I am Chinese yet I can't write it. Honestly in the past it may even seem cool to be bad at Chinese, but this time I was truly ashamed.
After this, I made myself copy the script as a form of redemption. Subsequently in my self reflection, I realise that learning the Chinese language is more than just mastering the verbal and written ability. When you learn Chinese, you learn the values. I love Chinese values, especially fillial piety. You also learn the depth of your emotions. Through simple verses, you appreciate that the Chinese language allows you to describe your emotions and thoughts to a depth that makes you sigh... and say... "that's deep!".
Now Lucas also has a preference for English. At times when I speak in Mandarin to him he does not like it. But I keep trying, and now he responses in Mandarin at times.
If I don't show an interest in the Chinese language, and don't show him how beautiful the Chinese language can be, how will he ever be interested in it? Perhaps he will not appreciate it in the next ten to twenty years, but at least if he has the foundation and he finds the appreciation years later, he will have the ability to pick it up. Just like what I am trying to do now.
I bought a book about Buddhism. I have been trying to know this religion more, but the Chinese books always baffles me. It's hard, I don't understand them. So I found this, not exactly what I want, but I will tell myself to read one story a day so as to improve my Chinese. Step by step, the divide gets smaller.
Wednesday, 25 June 2014
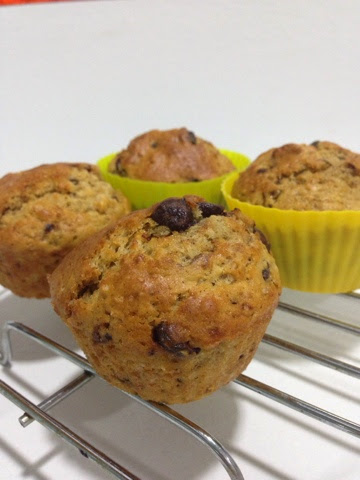
Airfryer coffee muffins... oh so tough...

I tried so-called 5 star rating muffin recipes, but they just don't come out right.
1st attempt was dry and not enough coffee taste - probably baked too long and too little coffee.
2nd attempt was still dry with stronger coffee taste - couple of people said they like it but also a couple said they were as hard as stone! (ok that's an exaggeration but you can see the message I am sure, loud and clear)
This is the 3rd attempt, by far the best. It's soft and fragrant, the chocolate chips are nice. But I feel the coffee flavour does not come out strong enough and could be more moist.
Yeah it's not common to post a recipe that the writer is usually not proud of, but I still do it, so that if any souls out there have a fantastic recipe, or dear children if one day you feel like improving on it, please do....
And don't worry, this recipe is far from bad, still enjoyable.
Adapted from http://sweetpeaskitchen.com/2011/09/coffee-break-muffins/
Ingredients:
2 cups all-purpose flour
1/3 cup sugar (I used raw sugar)
1 tablespoon instant espresso powder (I used instant coffee)
1 tablespoon baking powder (yeah you read that right!)
1/2 teaspoon ground cinnamon
1/8 teaspoon salt
1/3 cup (packed) light brown sugar (I used 1/4 cup raw sugar and just added at the same time as the sugar listed above)
1/2 cup semi-sweet chocolate chips (I also added 1/2 cup walnuts)
1 cup strong coffee, cooled (I used 1/2 cup espresso and 1/2 cup yoghurt)
1 stick (8 tablespoons) unsalted butter, melted and cooled (I used 8 tbsp oil)
1 large egg
1/2 teaspoon pure vanilla extract
Directions:
1) Preheat Airfryer to 180 deg C for 10 min.
2) In a large bowl, whisk together the flour sugar espresso powder, baking powder, cinnamon and salt. Stir in the brown sugar, breaking up any lumps. Add chocolate chips and stir to combine.
2) In a large bowl, whisk together the flour sugar espresso powder, baking powder, cinnamon and salt. Stir in the brown sugar, breaking up any lumps. Add chocolate chips and stir to combine.


3) In a medium bowl, whisk together the coffee, melted butter, egg and vanilla extract until well combined.
4) Pour the liquid ingredients over the dry ingredients and gently but quickly stir to blend until just combined.
5) Fill each muffin cup 4/5 full with batter.

6) Bake in Airfryer for 8 mins at 180 deg C. After 8 min if one or two are not done, remove those that are done and give the uncooked ones another 2 min at 160 deg C.
Tuesday, 17 June 2014
Lucas, a good elder brother (at times)
When Lucas is not busy fighting or snatching toys or bullying Luis, he sometimes shows his 'good elder brother' side.
----------------------------------------------
One time he was staying at home because of HFMD in school (I guess that puts him in a good mood. Yea! No school!). I was leaving home for work when Luis started crying. Lucas came and did 3 good-brother things.
First he told me, "You haven't sayang Luis!". So I did that.
Then he pep-talked Luis, "Luis, Mummy has to go to work.".
Luis was still crying, so he said "Luis, you see..." and proceeded to make a funny face at him.
Well I pretty much forgot if it worked, I didn't think it did but I was so proud of my Lucas.
---------------------------------------------
One day we were at Jarett's house and Luis did something that caused Jarett to gently scold him. Then Lucas told Jarett, "Don't scold Luis."
Well in fact Lucas told me this many times when I scold Luis too.
Seems like the bullying and scolding can only be done by him....
 |
| At the end of one of the swimming sessions at the pool. |
Sunday, 15 June 2014
Super moist Air fryer blueberry muffins
It took me about 5 batches over a few weeks before I can get these muffins to the right golden brown colour and moisture. I was trying to be healthy and cut fat and sugar but I think the muffins become more dry. So far this is as good as it gets! Oh what a sense of satisfaction!


INGREDIENTS:
1 1/2 cup flour (cake flour may be an option for less dense and fluffier texture)
1/2 cup sugar (less if your fillings are sweet)
1/2 tsp salt
2 tsp baking powder
1/3 cup vegetable oil
1 egg
Top up with yoghurt to 1 cup
2 tsp vanilla extract
1 cup blueberries
HOW:
1) Wash and drain blueberries then coat with flour.

2) Combine flour, sugar, salt, baking powder in one large bowl. Whisk well to ensure even spreading of salt and baking powder.
3) In a separate cup, pour oil in. Then add egg. Add yoghurt till full cup. Then add vanilla extract. Whisk till combined.

4) Add wet to dry ingredients. Combine with fork. Do not over mix, just till they are combined.
5) Use a spoon or spatula to fold in the blueberries. Do not add too much else they will burst 'uglily' while baking.

6) Put 4 or 5 muffin cups in air fryer basket and then add batter to 3/4 full. Sprinkle some brown sugar on top of each muffin.
7) Preheat airfryer for 10 min at 180 deg C. Bake for 10 min at 180 deg C. Then stick a toothpick in. Those that are not cooked continue at 2 min for 160 deg C. Those that are cooked remove from airfryer.
Notes:
1 cup = 250ml
Sprinkled sugar on top of muffin is very nice especially because the top is crispy.
Sprinkled sugar on top of muffin is very nice especially because the top is crispy.
I realise that different air fryers may have different temperature control. Using the same temperature on my brother's and my air fryer, his muffins always turn out more golden and mine dark. Thus do adjust your temperature up or down, or time as well accordingly.
My air fryer bakes unevenly. Muffin near the front right gets dark faster. And muffins near the left inner side are not cooked fully at the end of 10min, thus need 2 more min.
Other variations:
Cranberries and chocolate, with cake flour, is a surprisingly nice combination.
Lychee is very fragrant and moist. If after adding the lychee and juice it's wet, just add more flour.
Apple and cinammon can be added when you don't have enough blueberries.
Generally just go with your heart's desires!
Apple and cinammon can be added when you don't have enough blueberries.
Generally just go with your heart's desires!
Past tries: I tried 190deg C and a small bit was burned on top, and it's a little hard though crunchy on top. 160 and 165 for 15 min is golden brown but dry and lopsided.
Tuesday, 10 June 2014
Guilt-free Cajun chicken fried vegetables
Husband is on a quest to lose weight. And he said 'no carbs'! And I was in a mood for Cajun chicken so here goes the healthy and delicious Cajun chicken cum vegetables dinner we had on Sunday.


Serves 5.
INGREDIENTS:
Roughly 5 chicken fillets (I just used 1 pack bought from ntuc), cut to pieces
1 yellow capsicum, diced
1 red capsicum, diced
Handful of cherry tomatoes, diced
5-6 long beans, diced
3/4 of a big onion
Handful of bean sprouts (cos I had some left)
1/2 cauliflower, diced
3/4 bowl quinoa
6-7 garlic cloves, diced
Sesame oil (optional, else just use more oil)
Light soya sauce
Pepper

METHOD:
1) Season chicken with dash of light soya sauce and pepper and Cajun powder. Careful not to use too much soya sauce cos Cajun powder has salt.
2) Add 3/4 bowl of water to quinoa in a small pot and bring to boil. Then turn to low heat and simmer till water is dried out.
Note: usually you add double the water, but here I want the quinoa to absorb the liquid from the vegetables.
3) In a pan on low-med heat, add oil and 1/3 of garlic. Turn to low heat. Stir fry, then add tomatoes. Let juice come out (~3-4 min) then add capsicums. Stir fry then close lid to simmer for 2min, more juice will come out.

4) Add quinoa to pan and simmer for 3min so it can absorb the juices. Then off heat and keep lid closed.
5) In another pan at low-med heat, add oil and garlic and stir fry. Add chicken and stir fry, not constantly so that chicken can brown on the sides. Remove from pan when cooked.
6) In a large wok on low heat, add oil and remaining garlic and stir-fry. Add onions and fry till almost soft.
7) Add bean sprouts, fry, add long beans. Add a dash of light soya sauce.
8) Add cauliflower, add a few swirls of sesame oil, stir fry.
9) Add vegetable and quinoa mixture. Stir fry.
10) Add chicken. Stir fry. Add some light soya sauce to taste (maybe 2-3 tablespoons).
11) Off heat and serve!
Notes:
It may still be soggy if vegetables has more sauce than the quinoa can absorb. Mine was soggy cos I didn't let the quinoa absorb, so try step 4 and see how it is.
Subscribe to:
Posts (Atom)